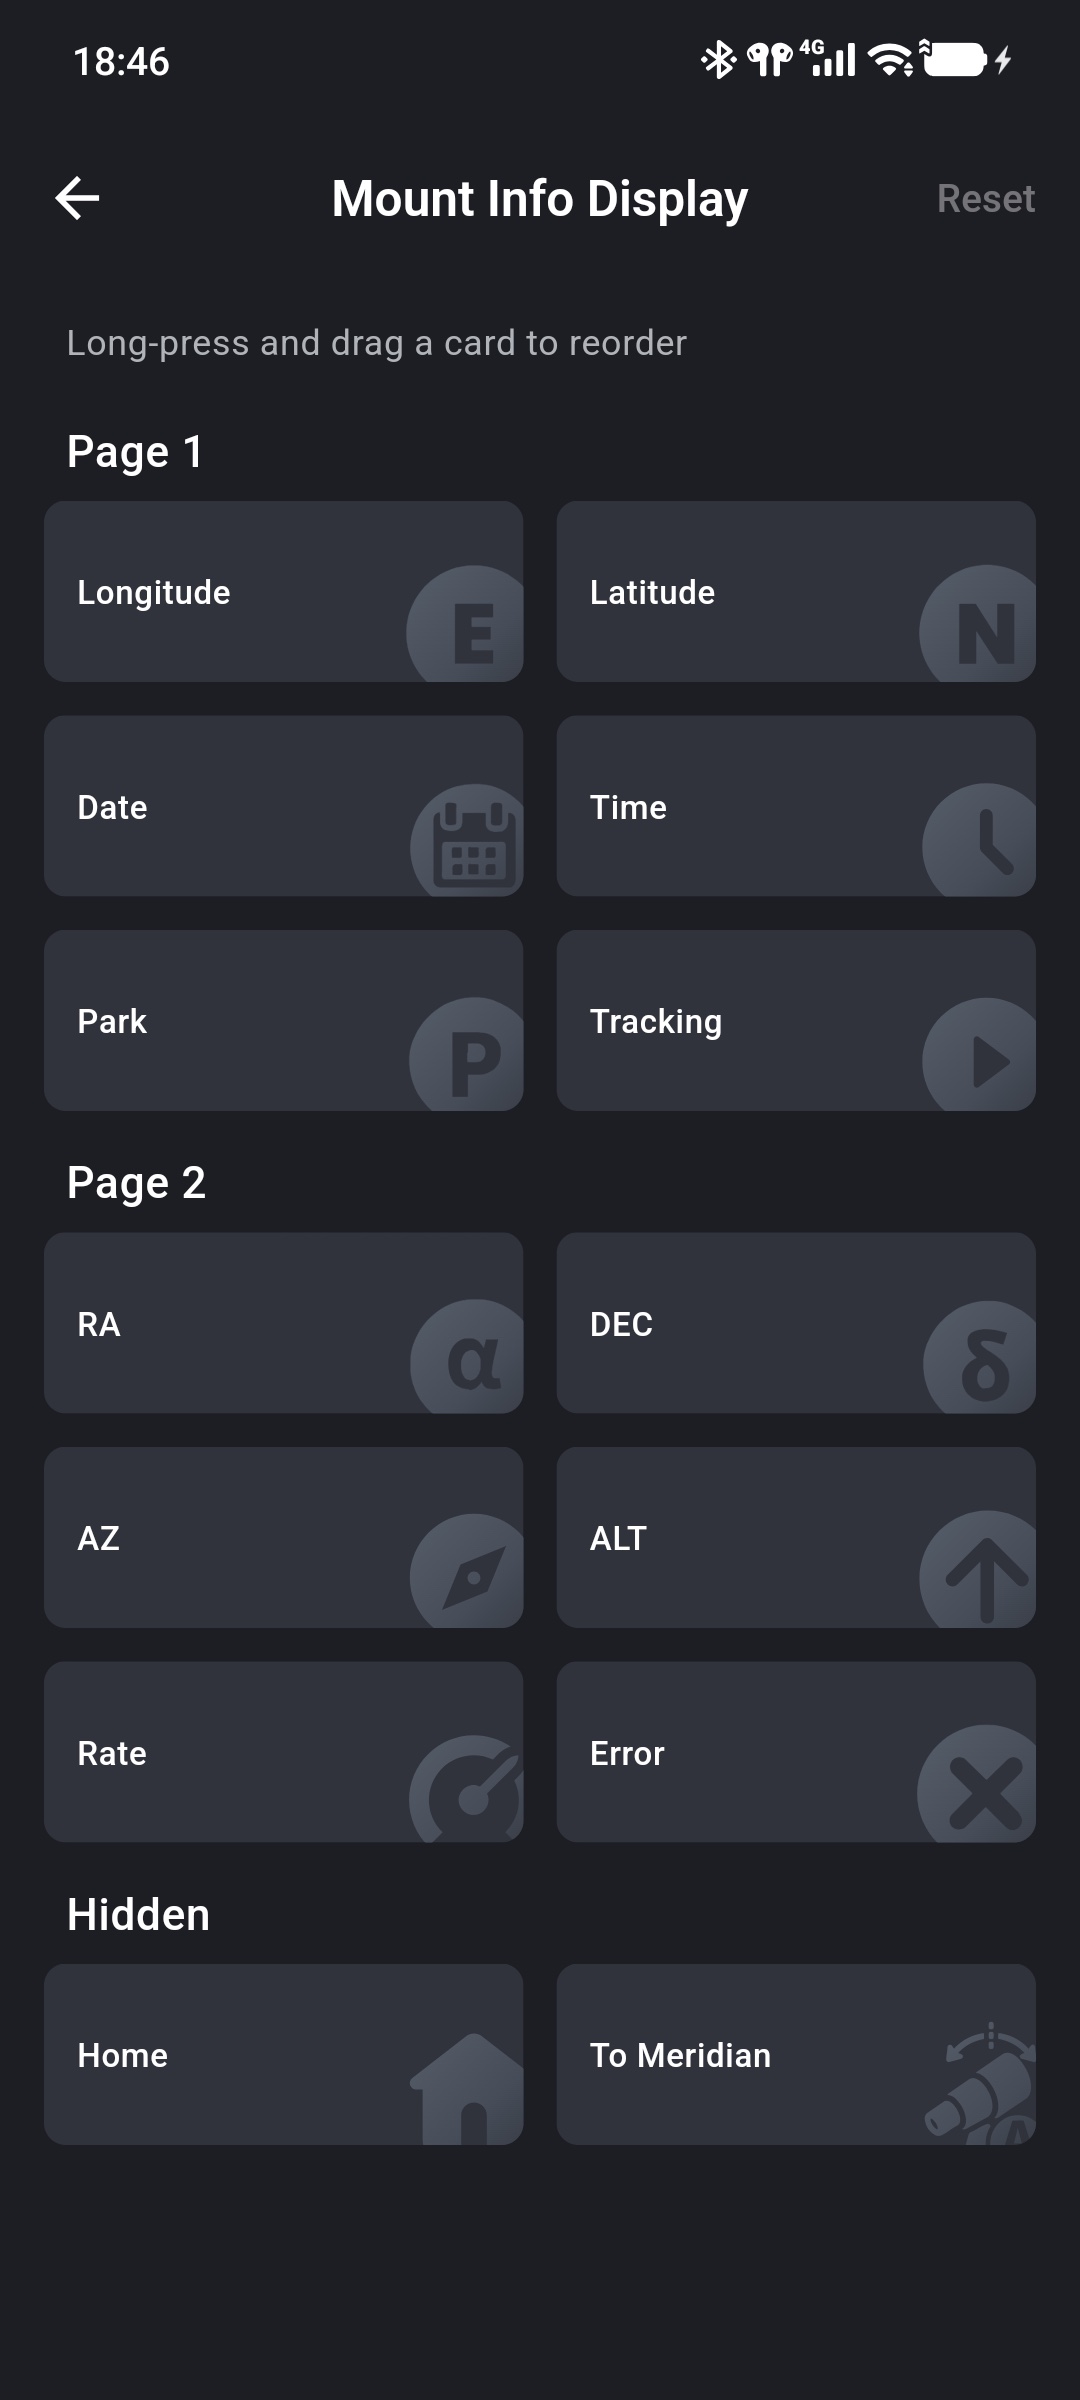
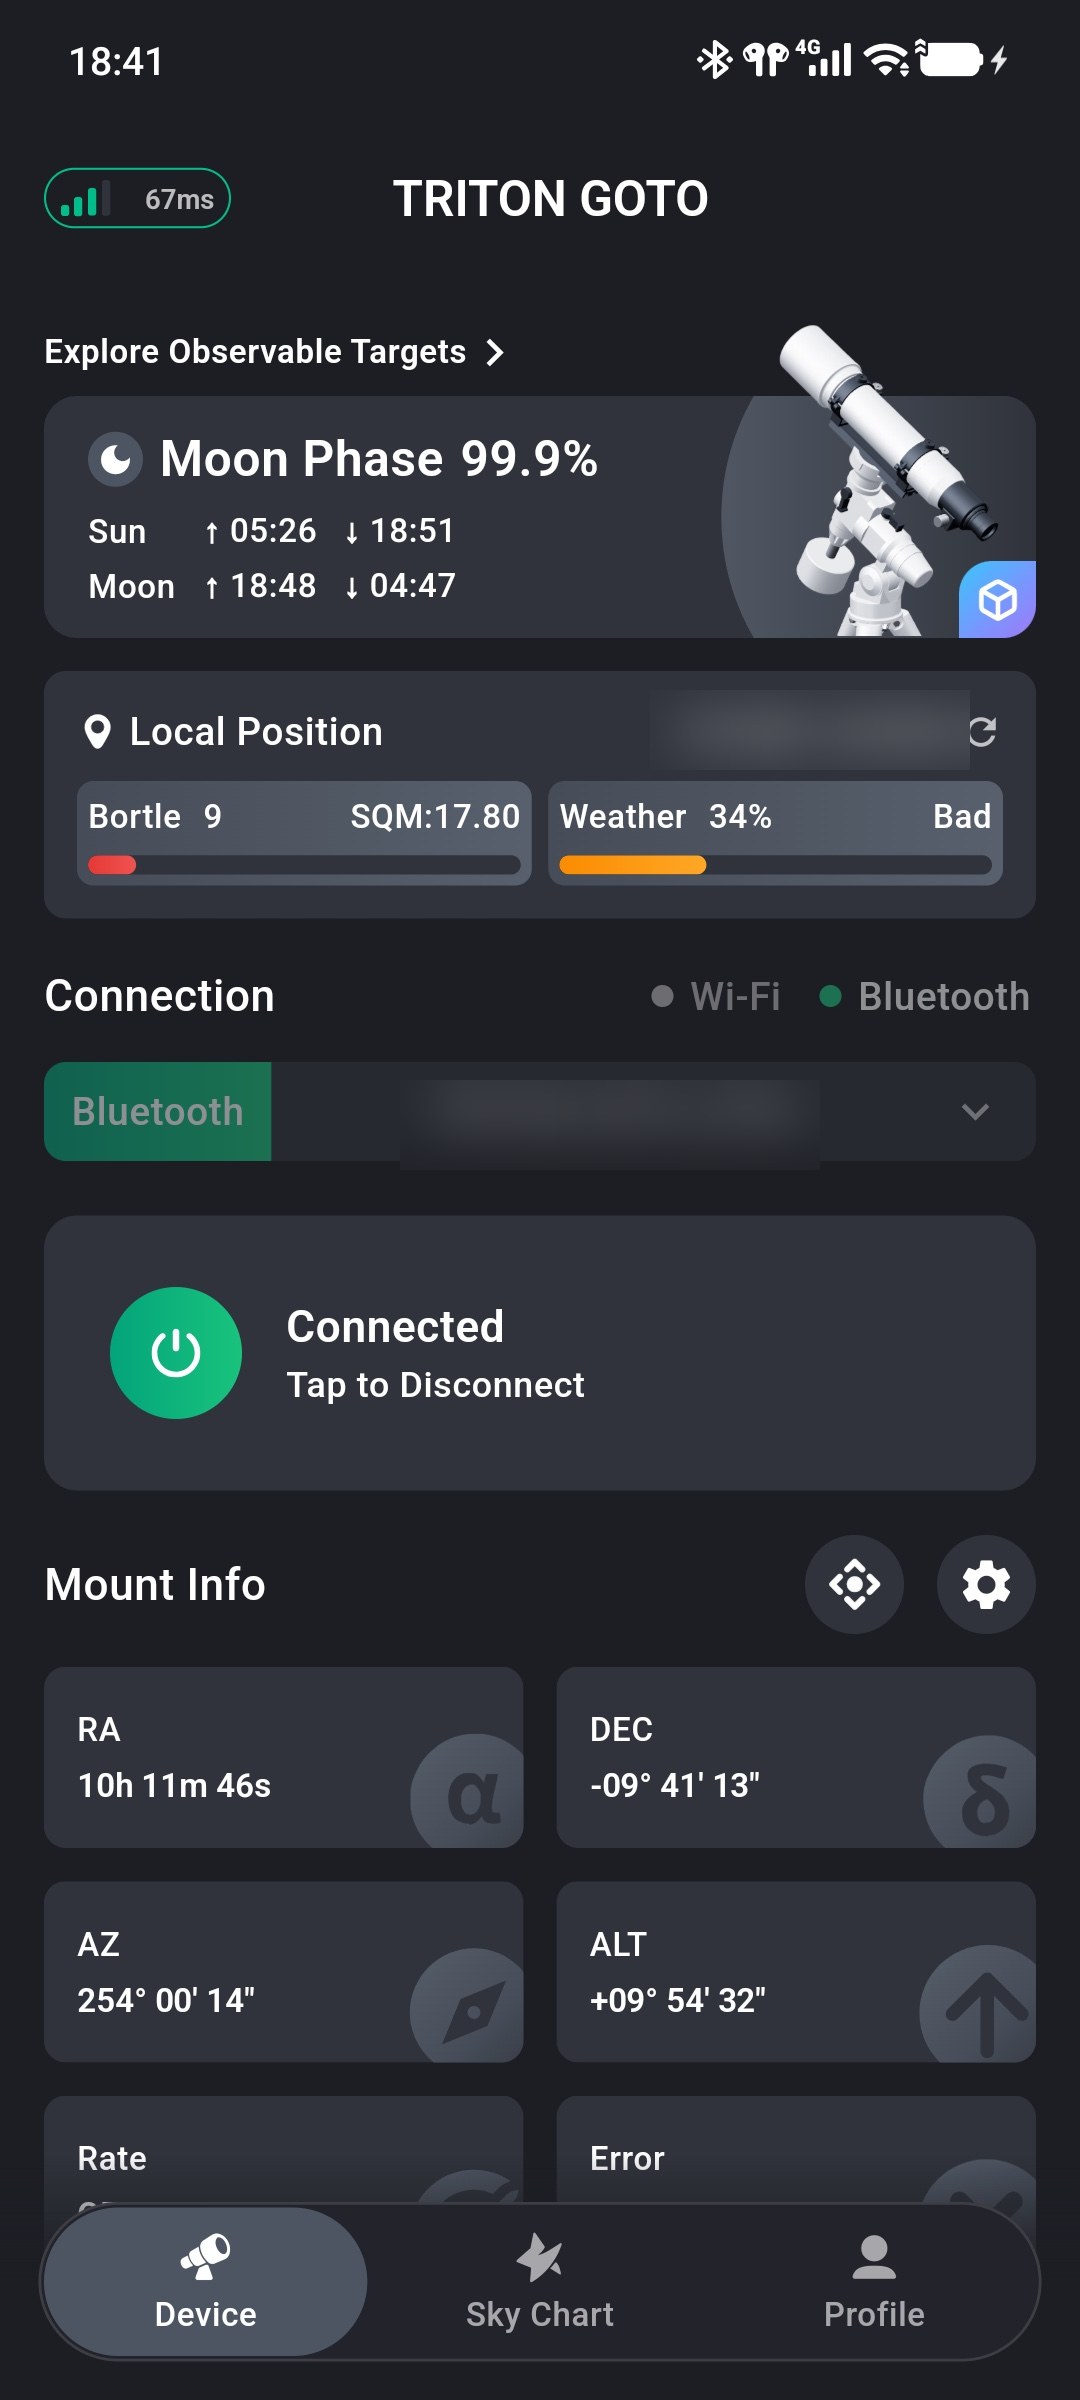
After connecting to ONSTEP, TRITON GOTO displays the mount's location, time, operating state, and pointing information in the mount information area of the Device screen. The information is split across two pages with six items per page. Swipe horizontally to switch pages.
TIP
The information items refresh with live values only after ONSTEP is connected. If the mount is not connected, complete the connection steps in Quick Start first.
Location, Time, and Operating State
The first page displays Longitude, Latitude, Date, Time, Park, and Tracking by default. Use these values to confirm that ONSTEP has the correct observing location and mount state.
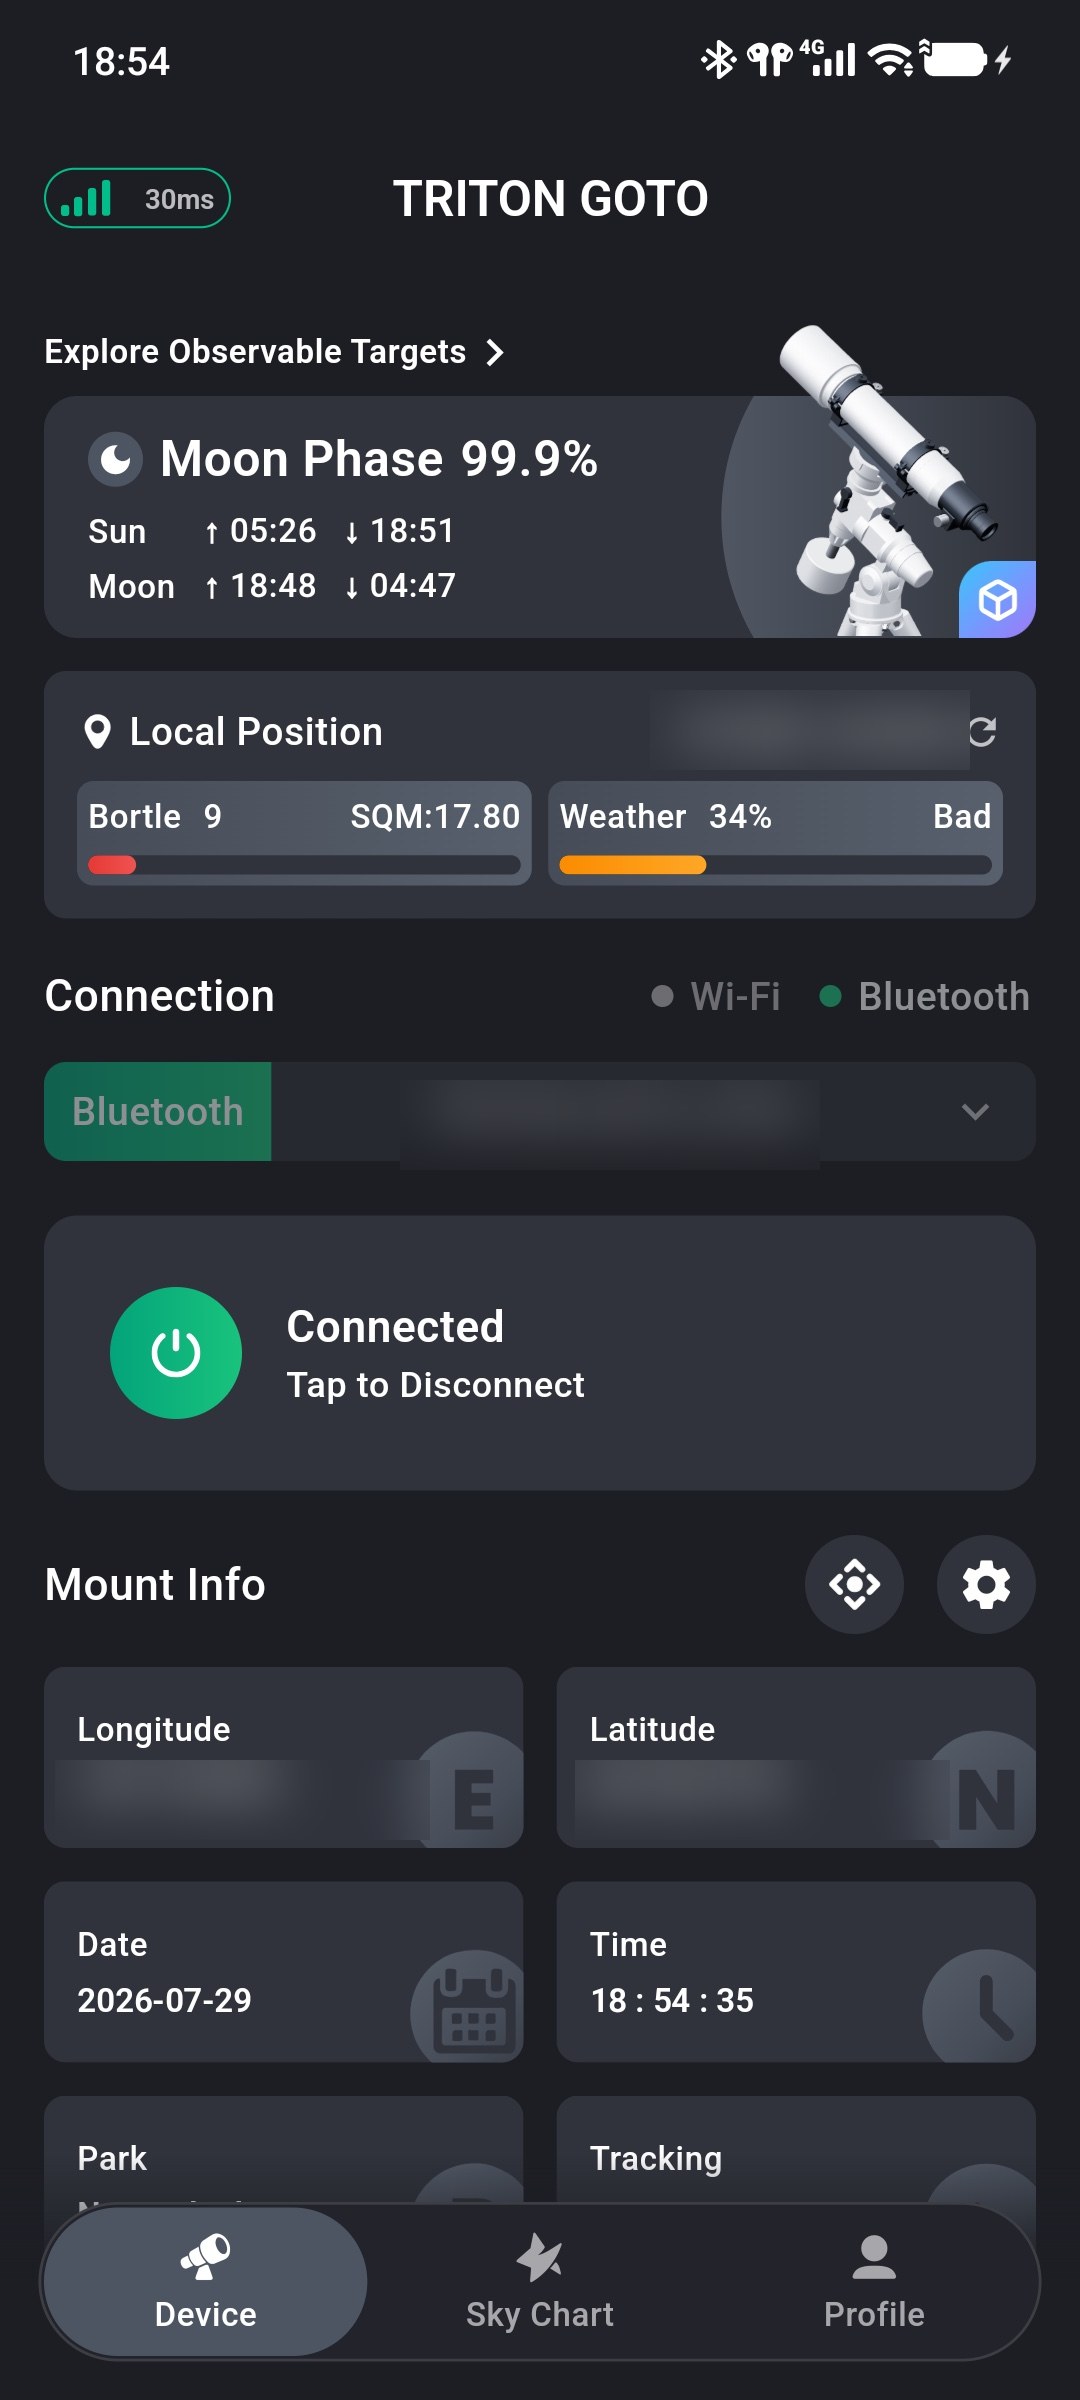
1. Longitude and Latitude
Longitude and Latitude show the geographic location currently used by ONSTEP. These values should normally match the location provided by the phone. Tap Longitude or Latitude to configure the mount location.
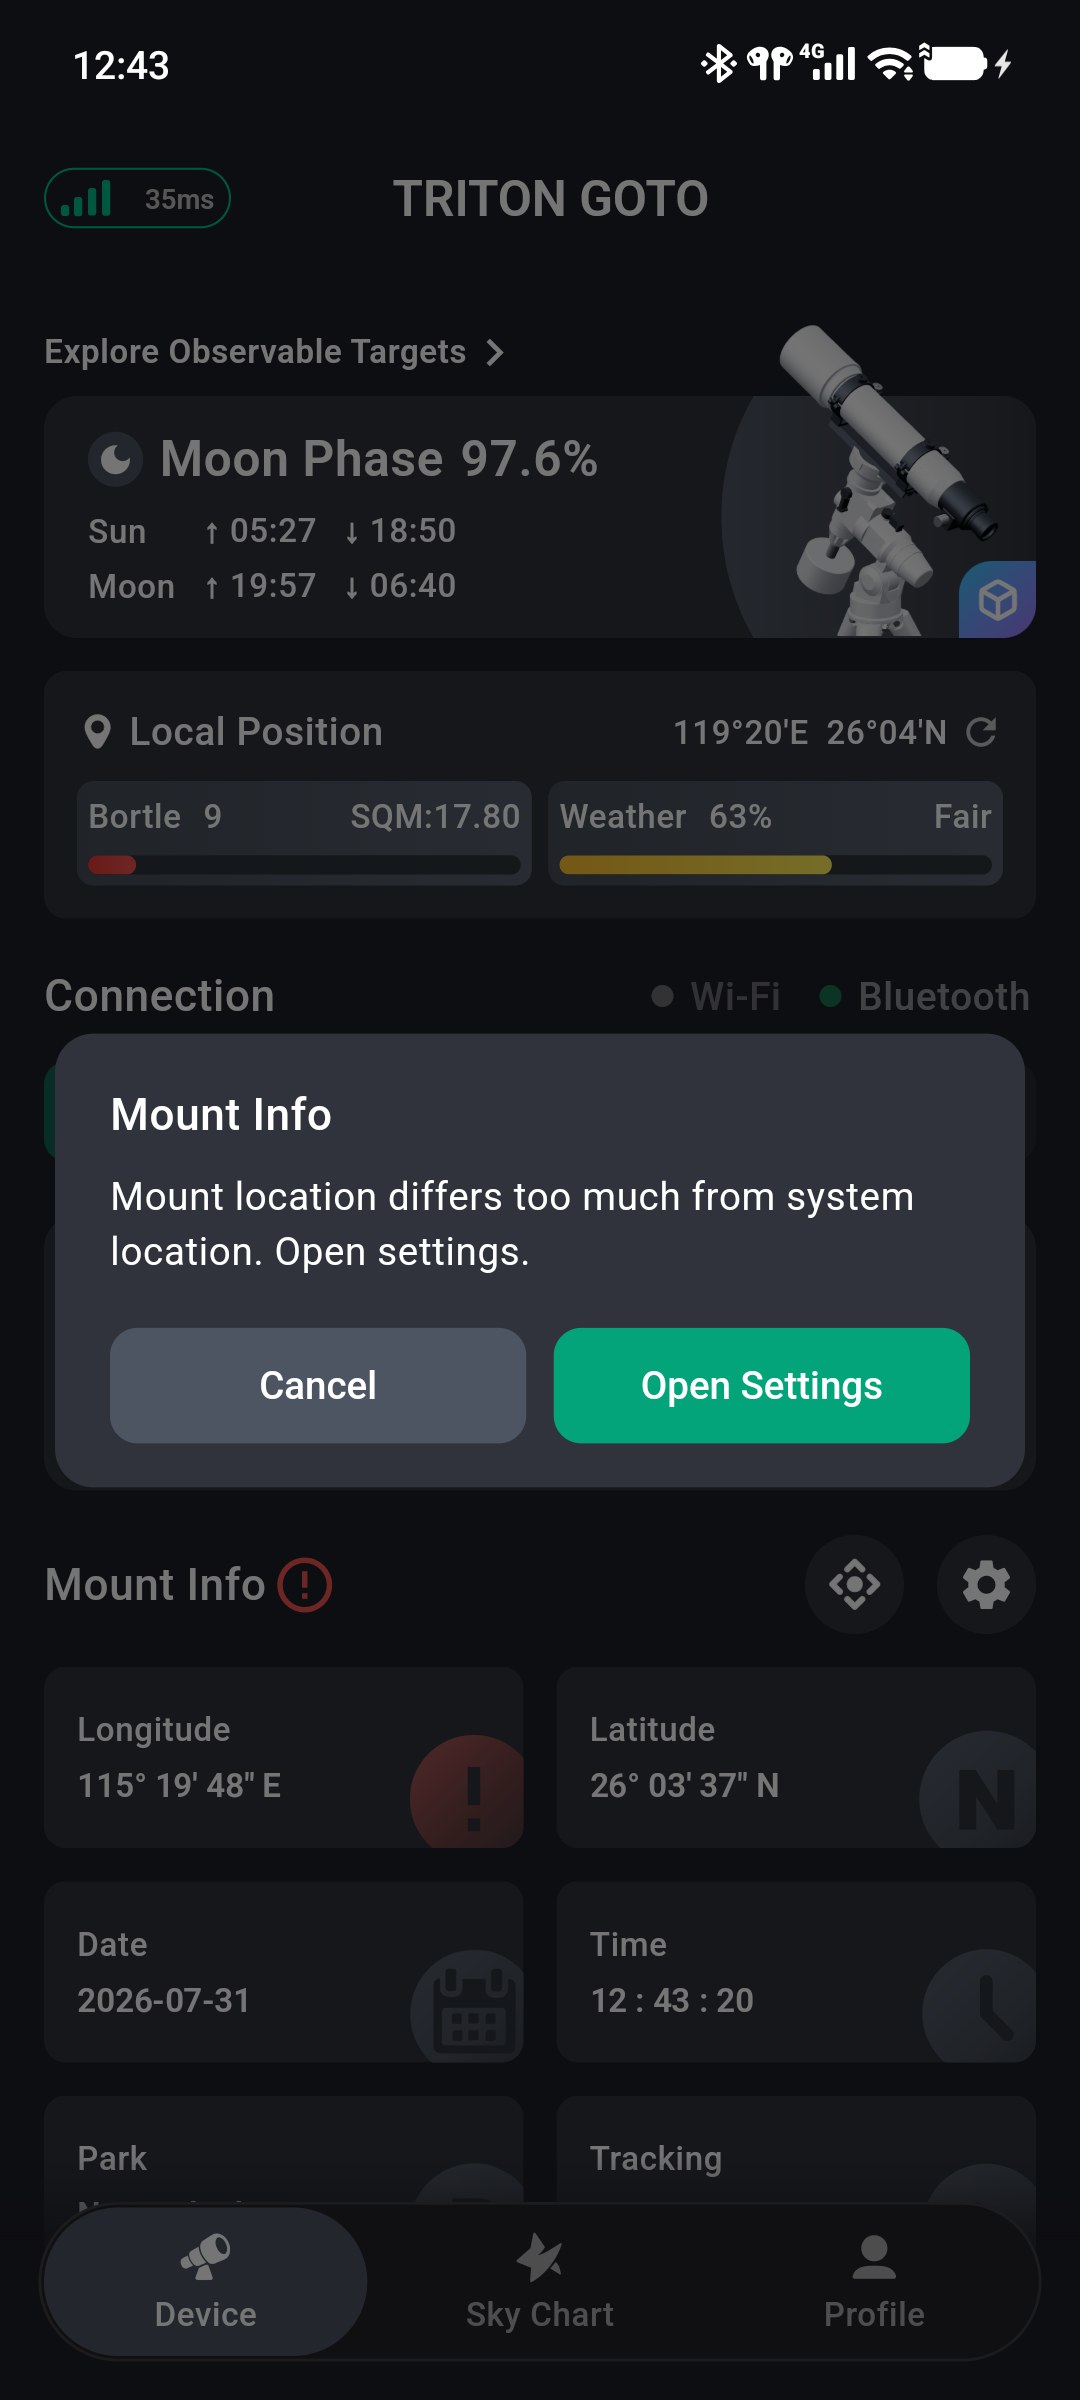
A red exclamation mark appears when the mount location differs significantly from the phone's location. Check the phone's location, then configure the mount location again.
2. Date and Time
Date and Time show the date and time currently used by ONSTEP. These values should normally match the phone's system time. Tap Date or Time to configure the mount time.
A red exclamation mark appears when the mount time differs significantly from the phone's system time. Synchronize the mount time again.
3. Correct a Time or Location Discrepancy
After the App obtains the phone's location, it compares that location with the values stored in the mount. It also compares the mount time with the phone's system time. A red exclamation mark warns you when either discrepancy is substantial. Do not ignore this warning; correct the discrepancy before continuing.
- Tap the red exclamation mark beside Mount Info.
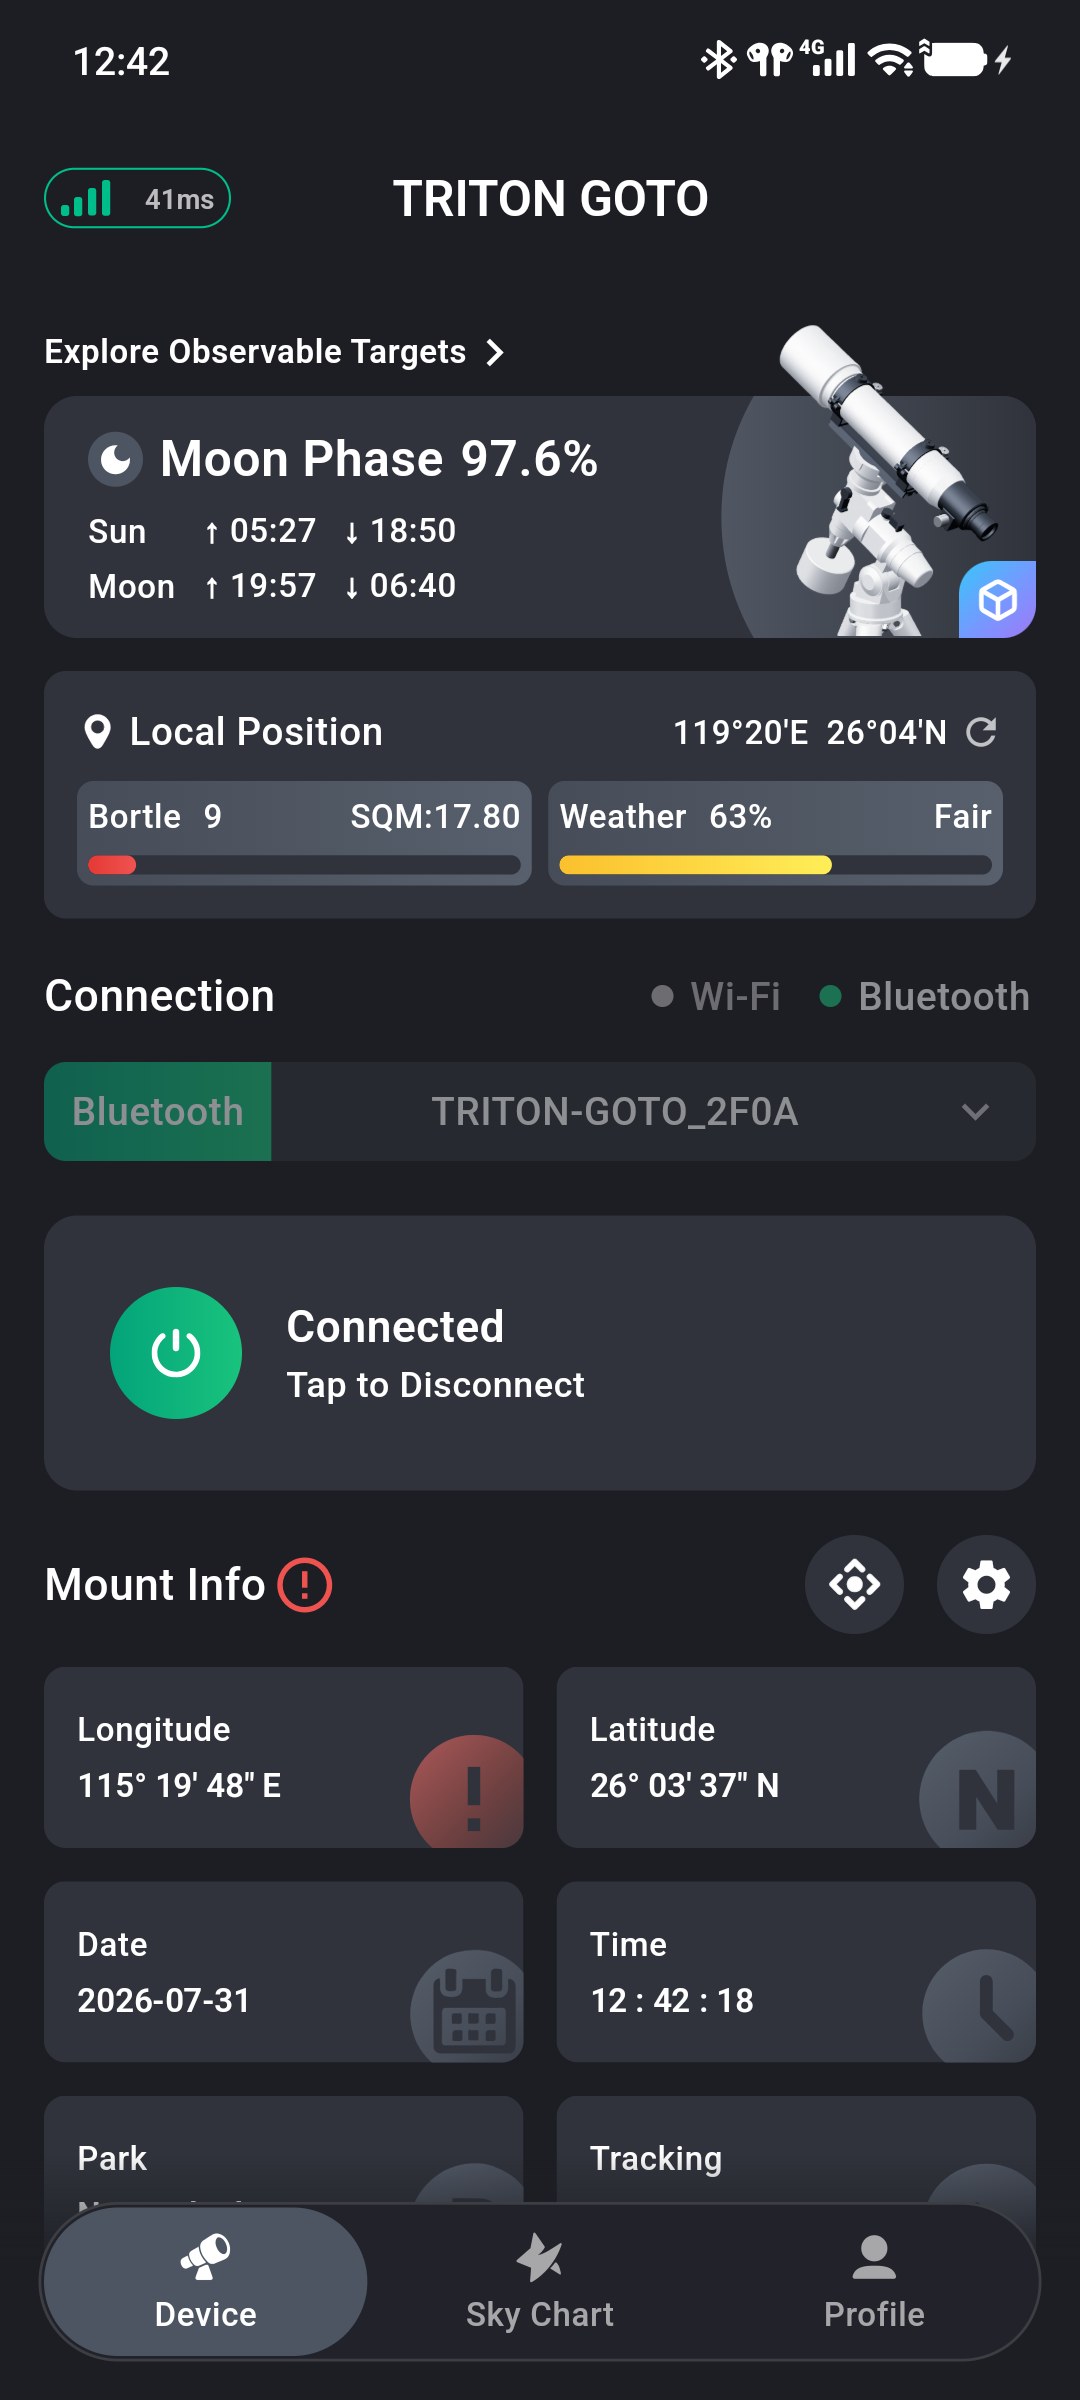
- Review the message, then tap Open Settings.
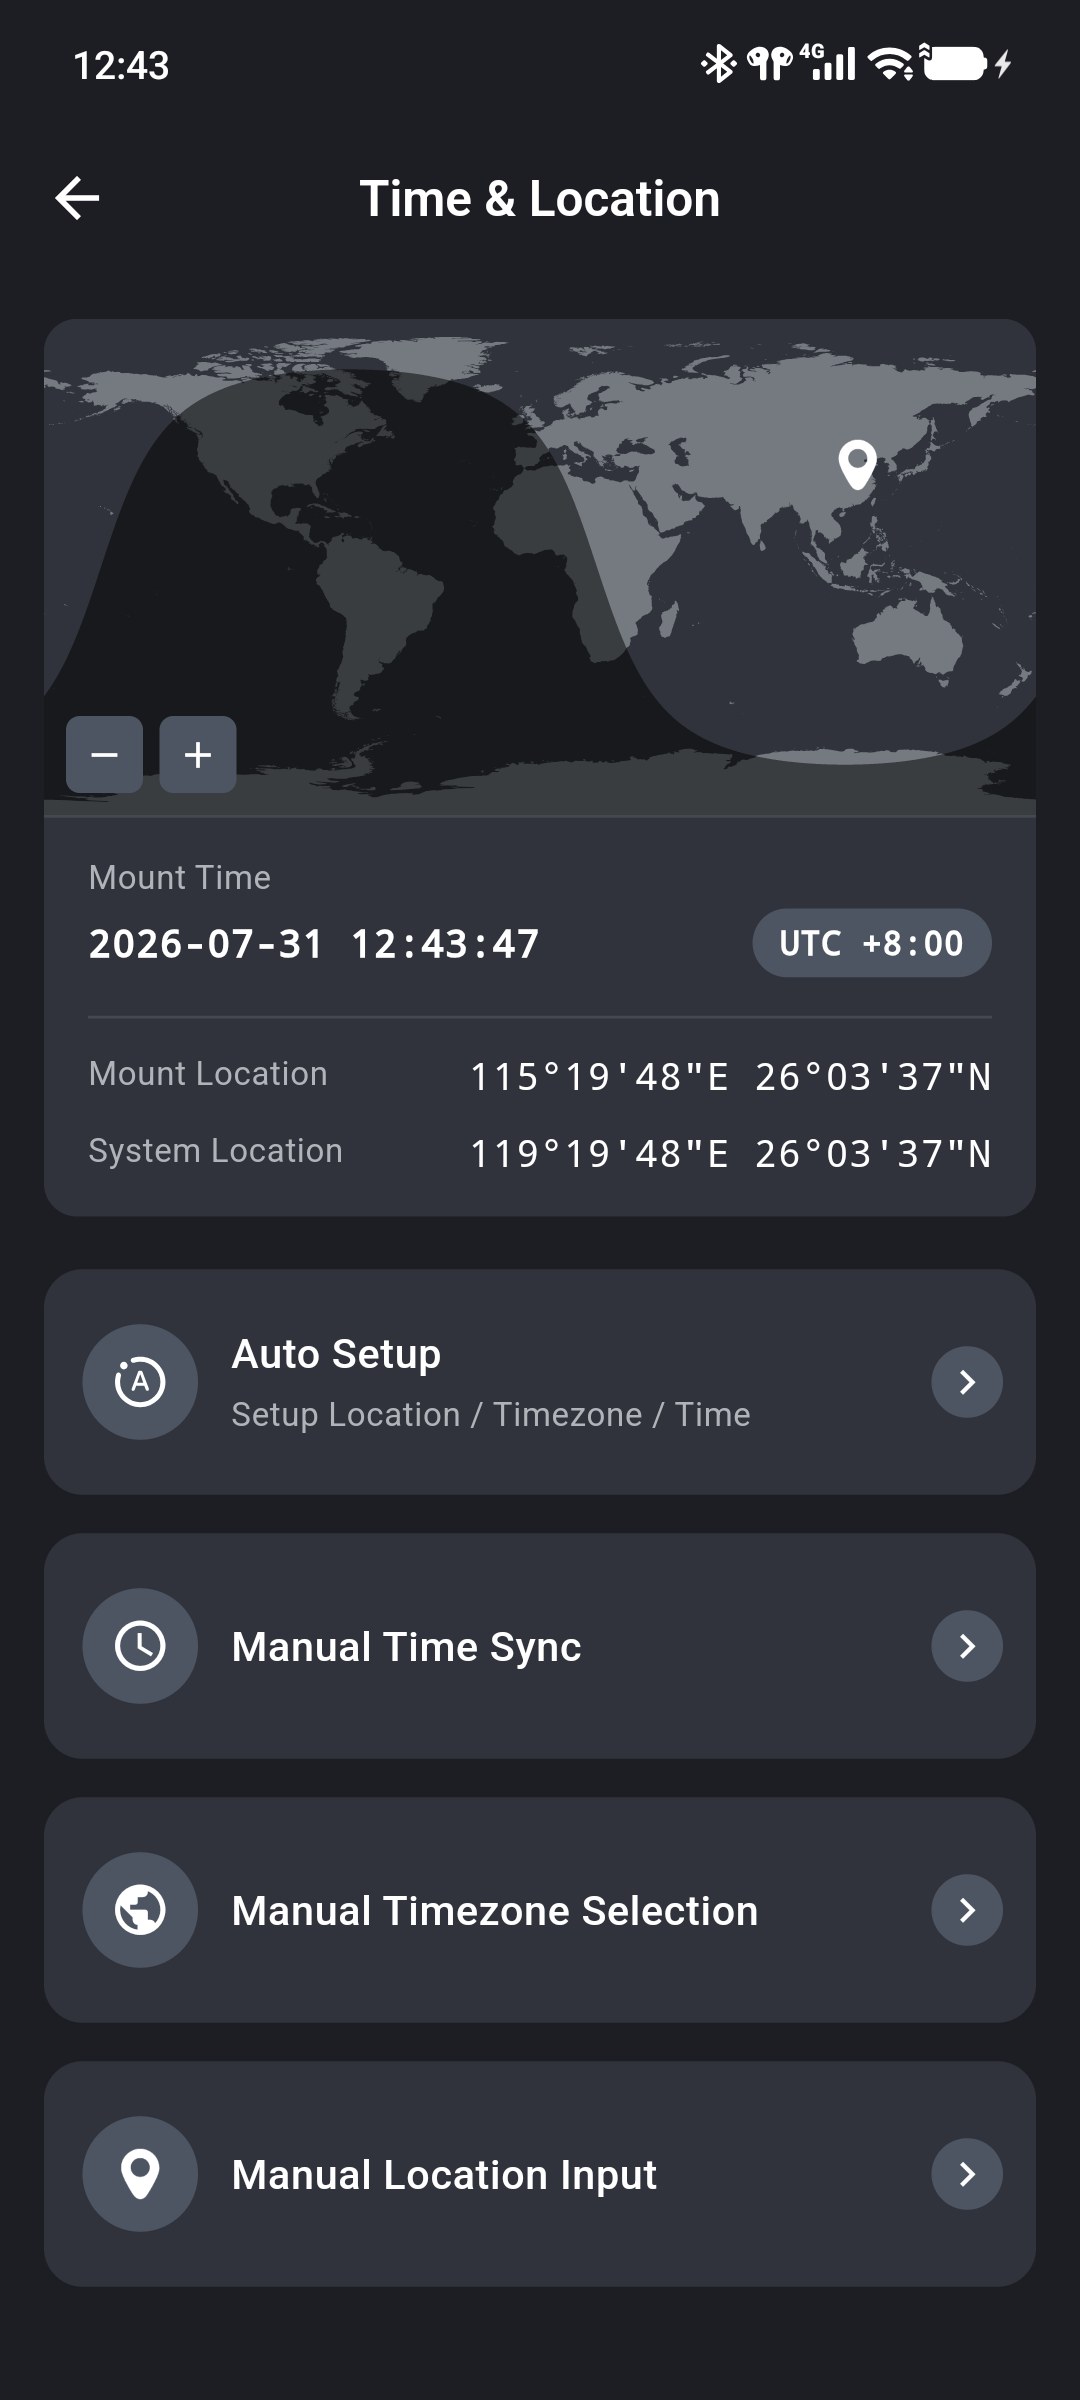
- On the Time & Location screen, tap Auto Setup to write the phone's time, time zone, and location to ONSTEP.
TIP
Before using Auto Setup, allow TRITON GOTO to access the phone's location and enable the system location service.
To correct only part of the information, use Manual Time Sync, Manual Timezone Selection, or Manual Location Input. See Time and Location Settings for detailed instructions. When finished, return to the Device screen and confirm that the red exclamation mark has disappeared.
4. Park and Tracking
Park shows whether the mount is parked. Tap Park to select Park Mount or Unpark Mount, depending on the current state, or select Set Park Position. While the mount is parked, the direction controls, tracking, and rate settings are unavailable. Unpark the mount before resuming control. See Start Controlling for details.
TIP
After you select Park Mount, the mount slews to its park position at GOTO speed. Before proceeding, confirm that the optical tube, counterweights, and cables have a clear travel path. Continue monitoring the mount until parking is complete.
Tracking shows whether mount tracking is enabled. Tap Tracking to open the manual control panel and change the tracking state.
To keep an object in the field of view, confirm that tracking is enabled and that the correct tracking rate is selected before observing.
Pointing, Rate, and Errors
The second page displays RA, DEC, AZ, ALT, Rate, and Error by default. These values show the telescope's current pointing and ONSTEP operating state.
1. RA and DEC
RA and DEC show the equatorial coordinates at which the telescope is currently pointing.
2. AZ and ALT
AZ and ALT show the telescope's horizontal coordinates.
Azimuth indicates the telescope's direction along the horizon. North is 0°, east is 90°, south is 180°, and west is 270°. This convention is the same in both hemispheres.
Altitude is the angle between the telescope's pointing direction and the horizon. The zenith is 90°.
3. Rate
Rate shows the tracking rate currently used by ONSTEP, including sidereal, solar, and lunar rates. Tap Rate to configure the tracking and guide rates.
4. Error
Error shows the current ONSTEP error state. It displays None when the mount is operating normally.
If a limit is triggered, or a motor, sensor, time, or location initialization error occurs, Error displays the corresponding message. Check the mount according to the error type until the error state is cleared.
Customize the Mount Information Display
TRITON GOTO lets you reorder mount information and hide items that are not needed. Open Profile → Preferences → Mount Info Display, then long-press and drag an item to move it.