
Sky Map Settings controls sky effects, guides, and light-pollution simulation. Changes apply immediately to the current Sky Chart and are saved for the next session.
Open Sky Chart from the bottom navigation and tap the layers icon in the lower-left. After configuration, tap × in the panel's upper-right to return.
TIP
These settings change only the App display. They send no movement commands to ONSTEP and do not rotate the mount.
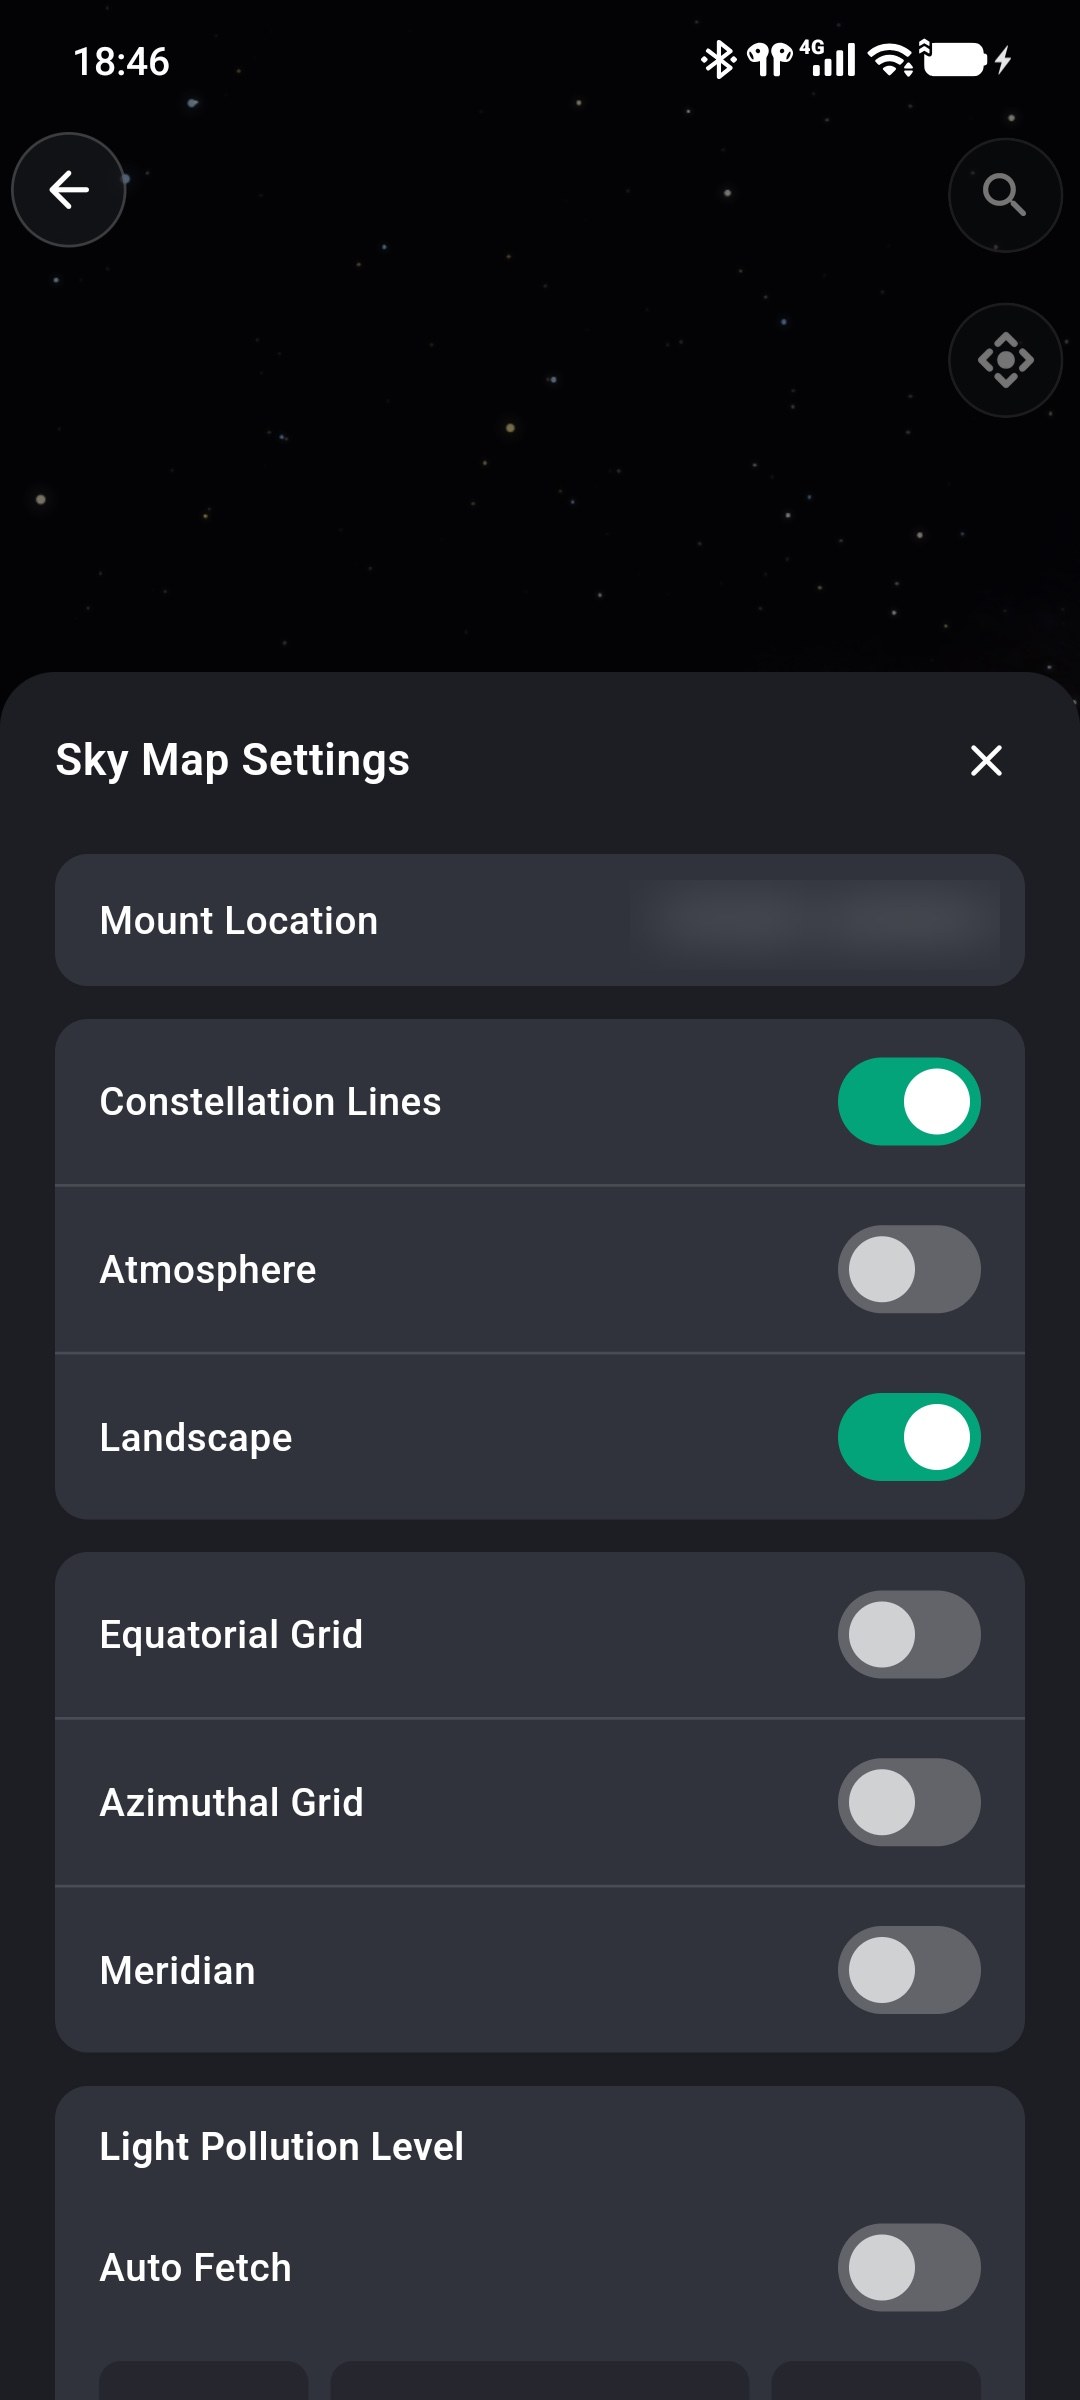
Verify the Sky Chart Location
The top of the panel shows the location currently used by the chart:
- when ONSTEP is connected and reports valid coordinates, Mount Location is shown;
- without a usable mount location, System Location is shown and phone location is used;
- if System Location has not been obtained, tap the item to request it.
Location affects the horizon, object altitude, azimuth, and visible sky. If it is incorrect, update ONSTEP under Time & Location, or check App permission and the phone's location service.
Configure Sky Effects
Constellation Lines
Enable Constellation Lines to show constellation outlines and names. Disable it to reduce auxiliary information.
Atmosphere
Enable Atmosphere to simulate day/night brightness and atmospheric effects near the horizon. Disable it to see stars and deep-sky objects more clearly during daytime or twilight.
This changes rendering only and does not mean an object is actually visible.
Landscape
Enable Landscape to show ground scenery and a horizon reference. Disabling it reveals the chart below the landscape, but does not change actual object altitude or bypass the horizon limit.
Display Coordinates and Meridian
- Equatorial Grid: Shows the RA/DEC grid for checking equatorial coordinates.
- Azimuthal Grid: Shows the azimuth/altitude grid for judging a target relative to the horizon.
- Meridian: Shows the meridian through north, zenith, and south for checking whether a target is near transit.
These options can be enabled together. If too many guides obscure the chart, retain only those required for the current task. See Astronomy Glossary.
Set Light Pollution Level
Light Pollution Level uses levels 1–9 to simulate sky background and visible star count:
- a lower value represents a darker sky and displays more faint stars;
- a higher value represents greater light pollution and removes more faint stars.
This simulation does not change object coordinates or GOTO results.
Auto Fetch
When Auto Fetch is enabled, the App uses light-pollution data for the current location and disables − and +.
After disabling Auto Fetch, use − or + to select 1–9. The displayed level at that time becomes the starting manual value.
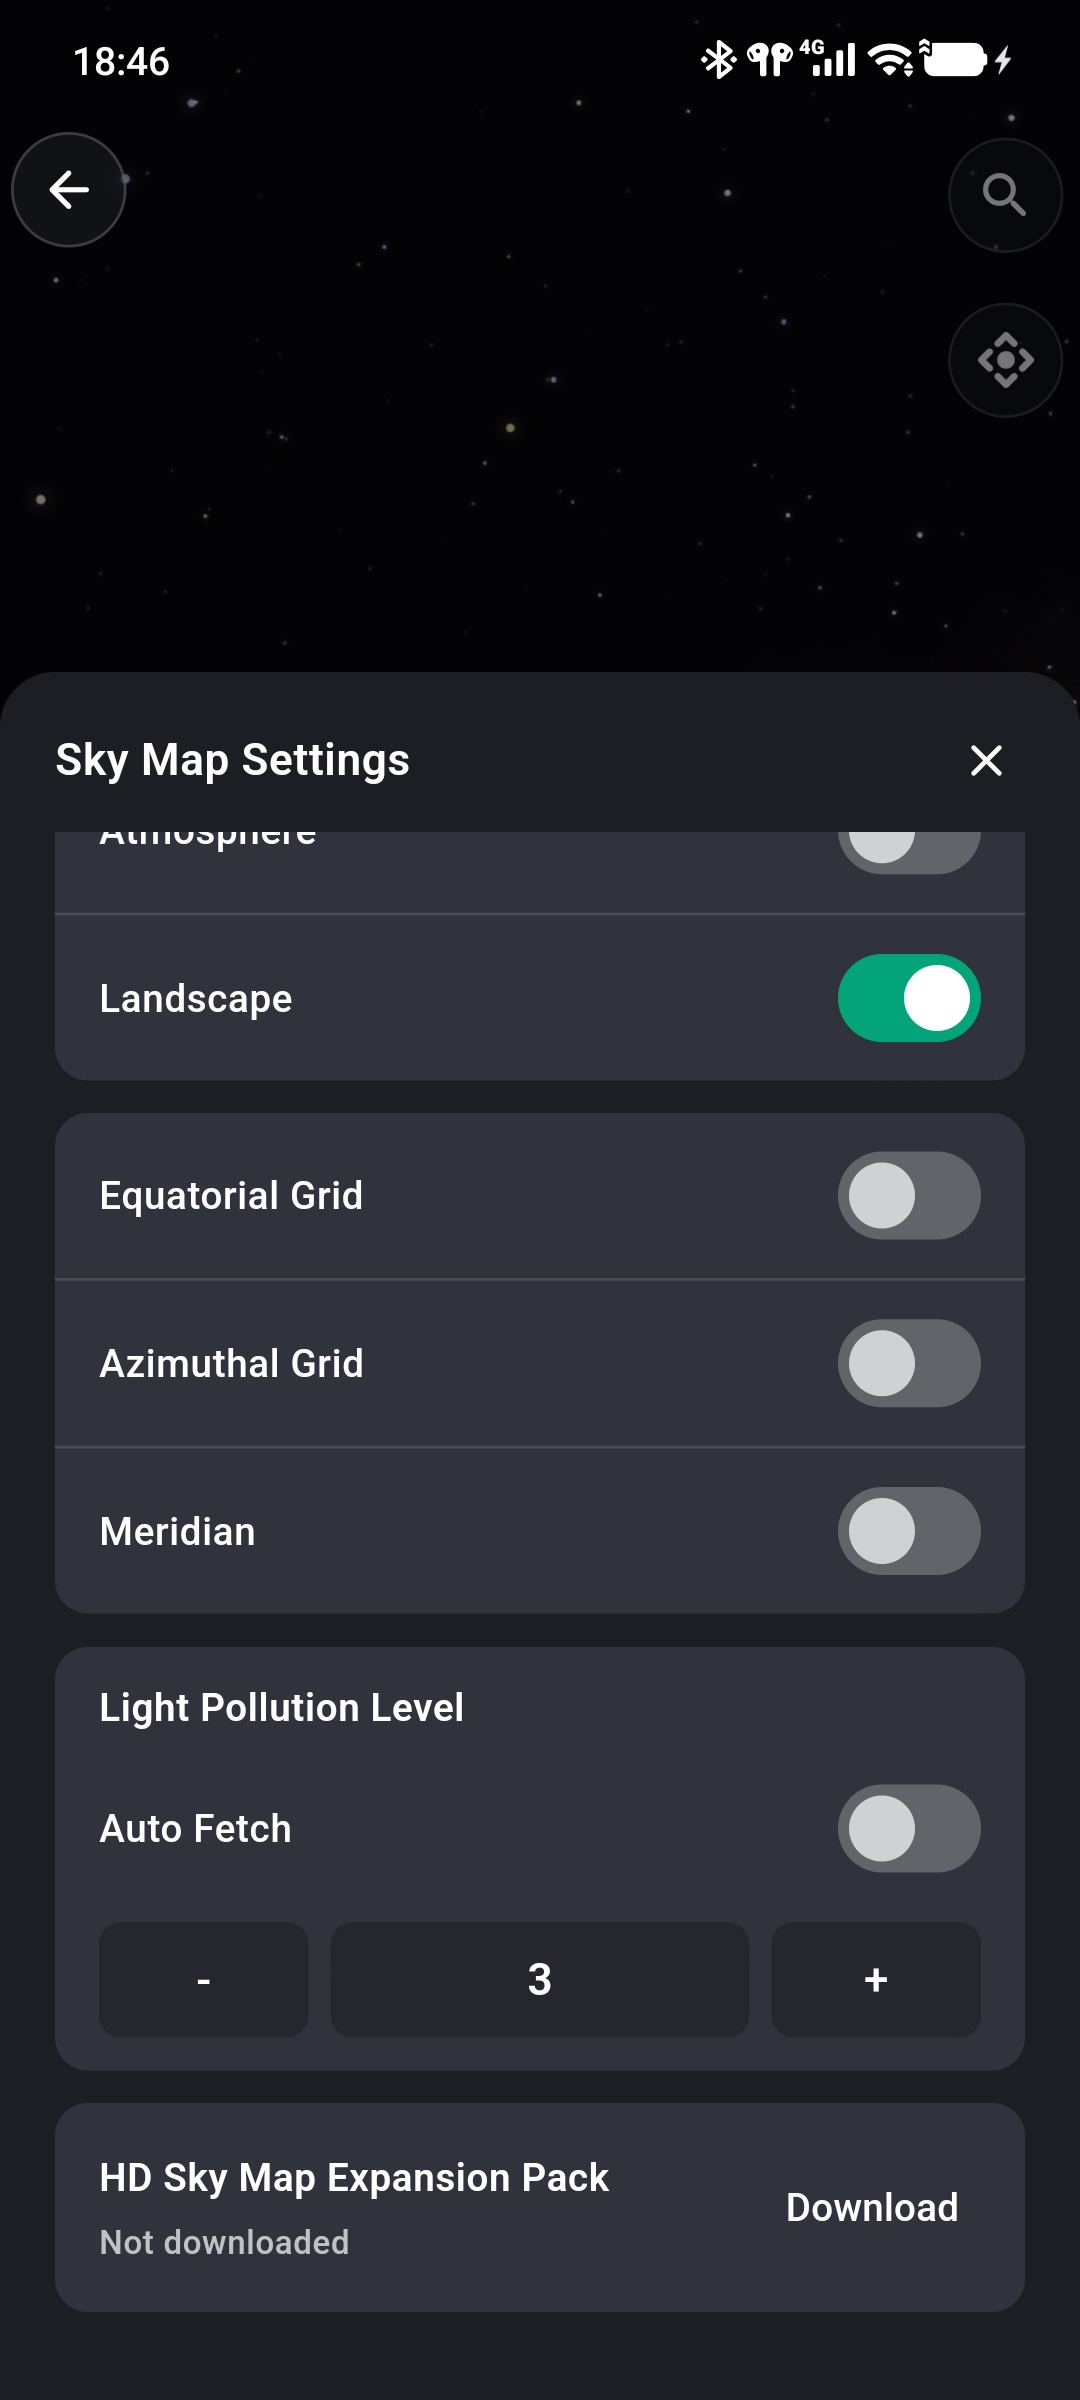
HD Sky Map Expansion Pack
When resources are not installed, HD Sky Map Expansion Pack and Download appear at the bottom.
After tapping Download, the App displays download, verification, and installation states in sequence. You can review progress or tap Cancel to stop. After installation, the Sky Chart reloads the corresponding local high-resolution resources.
Confirm adequate network connectivity and free storage first. If Download failed. Tap to retry appears, check the network and retry.
Recommended Combinations
Configure settings according to the task:
- Identify constellations: Enable Constellation Lines, Atmosphere, and Landscape.
- Check target altitude: Enable Landscape and Azimuthal Grid.
- Check RA and DEC: Enable Equatorial Grid.
- Check meridian position: Enable Meridian and one coordinate grid as needed.
- Plan observing: Set Light Pollution Level for the actual site so the display better represents local conditions.
After setup, return to Find Targets with the Sky Chart to search and perform GOTO.